Helloooooo!
Well, I finished the cake. Got it delivered at 5:00 on the dot. Got paid the big bucks and went to eat at Buddy's to celebrate all my hard work! What a great day! I think the cake turned out splendidly! Here's the process in pictures of the cake-makery today!
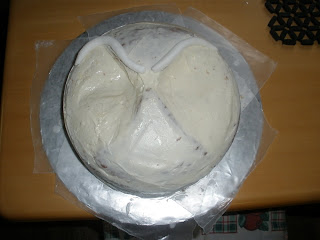
After leveling the cakes, I added some of the pieces back on to create the structure for the face.
Here is the structure and the picture I was working from.
Crumb coated...
...with rolled fondant to help create the "eyebrow"-like eye sockets.
Rolled out a sheet of white fondant and placed it ever-so-carefully on the face.
Trimmed the edges and smoothed it out.
Recruited my hubby to do some of the scary cutting of the eyes.
Added nostrils and started the fondant on the mouth.
Almost done...just a few more strips of black and a wash with my secret ingredient on the black...
Adding the final touches and words on the cake board and...
Voila!
There you have it, folks! Complete with "Burton's Nightmare" font for the piping and everything!
I was really happy with the way this cake turned out. I'm always so nervous that the structure of the cake underneath won't translate to what I want it to look like after I put the fondant on, but this worked out SO WELL! I really enjoyed making this cake, even under the time constraints. This is a cake I've been wanting to make since last Halloween. My husband and I are HUGE Nightmare Before Christmas fans (well, Tim Burton fans all around) and I made the coolest homemade Sally costume a couple years ago! Thanks to Omar and Victor for being thoughtful friends and ordering this cake from me, and thanks to Bridget for being born so I could make her this bad-ass cake! I hope they enjoyed seeing/eating it as much as I did making it!
CAKE SPECS:
Golden Vanilla cake, 2-9x2 layers
Creamy Vanilla frosting between layers and crumb coat
Wilton white and black fondant flavored with Wilton clear vanilla extract
Black piping gel for lettering on cake board


